Story at a glance:
- Sealing your windows and doors with the proper caulk and weatherstripping can help prevent unwanted air and moisture intrusion.
- Installing storm windows and doors provides an additional layer of protection from the elements and improves energy efficiency.
- Routinely cleaning your gutters and replacing damaged shingles in a timely manner helps protect your home from water damage.
As climate change increases the frequency and severity of extreme weather events, weatherproofing has become an even greater concern for homeowners around the world.
But even if climate change weren’t a factor, improving your home’s weatherproofing measures is always a good idea—one that can help to bolster energy efficiency, reduce the risk of moisture damage, and increase resilience in the face of extreme weather.

Here are six maintenance tips for weatherproofing your home.
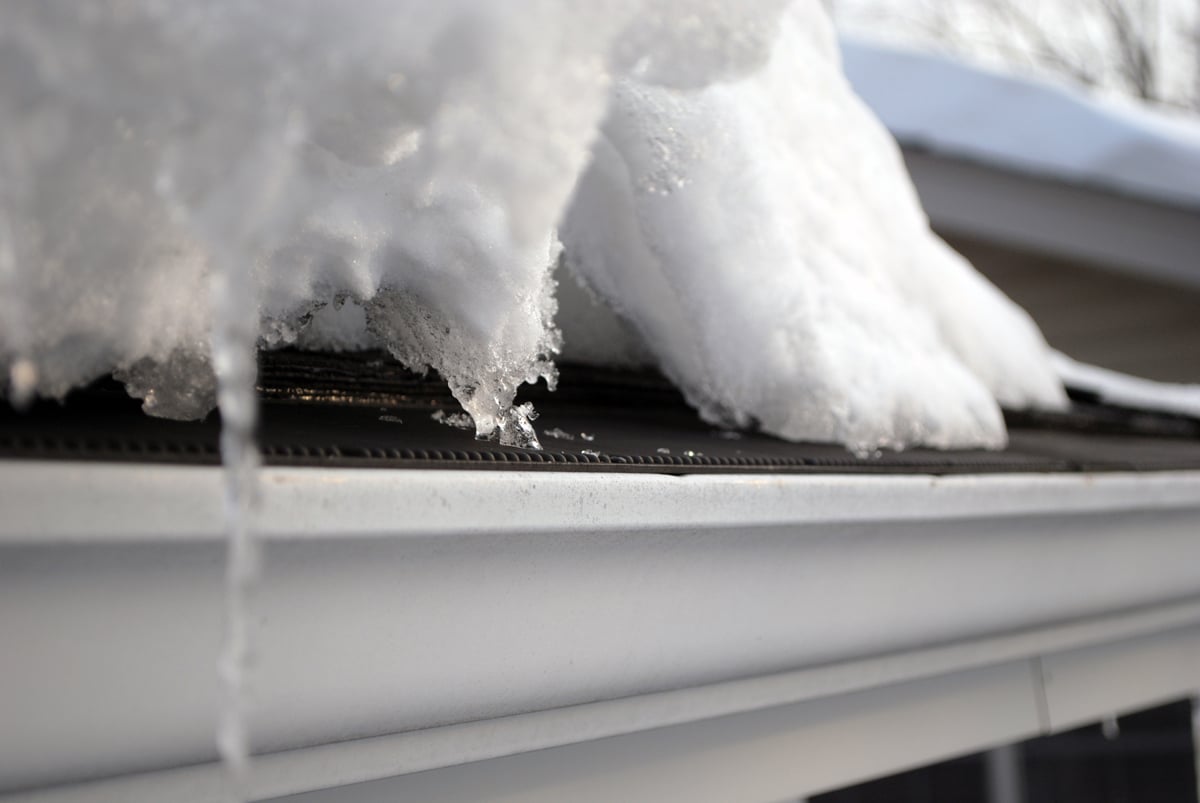
1. Clean Your Gutters & Install Gutter Guards
Installing gutter guards helps keep debris from clogging your gutters, reducing the risk of water damage. Photo courtesy of RainDrop Gutter Guard
Keeping gutters, downspouts, and other stormwater management features clean and in good condition is one of the simplest maintenance strategies there is when it comes to weatherproofing your home. When gutters become clogged with leaves and other debris, it prevents water from draining properly, causing it to pool and eventually overflow; this allows water to splash back onto the siding and potentially breach the soffit and fascia, causing it to weaken and rot over time, increasing the risk of leaks and interior moisture damage.
What’s more, the added weight from accumulated water can cause roofing materials to crack or sag, further adding to the likelihood of leaks. Water that overflows clogged gutters can also pool on the ground around your home’s foundation, increasing the risk of erosion, uneven settling, and structural damage in the long term.
It is for these reasons that experts recommend cleaning your gutters at least twice a year—once in the spring and once in autumn—although more frequent cleaning may be necessary depending on the amount and type of tree coverage. Homes shaded by pine trees, for example, often require routine cleaning every three months in order to prevent pine needles from clogging gutters and downspouts.
If your home is subject to heavy tree coverage or you live in a region that experiences extremely cold temperatures, it can be beneficial to install leaf guards over gutters to further minimize the risk of clogs—as well as ice dams in winter—and deter opportunistic birds and squirrels from building nests. There are many types of gutter guards on the market, including high-performance solutions from RainDrop Gutter Guard. Made from damage-resilient polypropylene, RainDrop’s gutter guard systems are sloped rather than flat and feature a grid that breaks self-cohesion of water droplets, immediately forcing water into the gutter. The grid size is small enough to prevent leaves, twigs, and other debris from entering, but not so small as to slow the flow of water—a problem many metal mesh guards encounter. “In letting the smaller stuff through you can handle a ton of water,” Ben Nitch, director of marketing and sales at RainDrop Gutter Guard, previously told gb&d. “The granules will flush through the system, and the gutters will work as they’re supposed to.”
2. Seal Gaps, Cracks & Other Openings
On average air leaks account for 25 to 40% of the energy used to heat and cool a typical home, potentially costing homeowners hundreds of dollars each year. In addition to wasting energy, these gaps and cracks allow moisture to enter your home, increasing the risk of mold and mildew growth.
Air sealing represents the single most effective way of addressing these leaks and is achieved by filling gaps/cracks with caulk or sealant and the application of weatherstripping, tape, gaskets, and/or spray foam to key areas. Places where air-sealing is recommended include attics, attic access points, and attic knee-walls; ducts and duct/pipe shafts; soffits and dropped ceilings; fireplace walls; whole-house fans; recessed lighting and outlets; sill plates, rim joists, foundations, and floor-to-baseboard connections; and exterior wall penetrations.
In addition to the areas listed above, there are two other extremely common places for air leakage to occur: windows and entryway doors.
Windows
According to the DOE, 25 to 30% of a home’s heating and cooling energy is lost through its windows—and while some of that is due to heat transfer through the glass and frame, a large percentage is due to leaks. Homes are particularly susceptible to air and moisture intrusion given that the majority of their windows are operable, a characteristic that creates more opportunities for gaps, cracks, and openings.
Sealing these openings is a two-part process that involves both weatherstripping and the application of caulk or sealant. Most windows will already possess some degree of weatherstripping, but damage and degradation can reduce its effectiveness over time; you’ll know there’s a leak if you can feel drafts even when the windows are closed. Different types of windows require different types of weatherstripping; a guide to the different types and when to use them can be found here.
Windows also require caulking—both along their edges where the frame meets the wall as well as seams along the frame itself—to prevent air from leaking in or out. Silicone caulk is generally recommended over the more conventional latex caulk, as it retains a higher degree of flexibility after it cures and will not crack or peel over time, ensuring a tighter seal even as materials expand and contract; silicon is also extremely water- and moisture-repellant, further adding to its longevity. Before applying new caulk to a window, remove any existing caulk to ensure proper adhesion.
Entryway Doors
Entryway doors typically account for a smaller percentage of overall energy loss compared to windows—largely due to their having a smaller glass surface area—though they still require weatherstripping along all their edges and caulking along the frame to prevent air from leaking in or out. If you live in a house built within the last hundred years, chances are your entryway doors already have some degree of weatherstripping, but that doesn’t necessarily mean it’s performing at an optimal level.
If you can see light along the top or sides of your door, or can actively feel air coming in around the edges, it’s time to replace/add weatherstripping. There are various kinds of weatherstripping available, with magnetic and tubular rubber/vinyl considered to be the most effective for the tops and sides of doors.
As a general rule of thumb, your entryway doors will need new or additional weatherstripping along their bottom edges if a sheet of paper can be slid underneath. If such a gap exists, it is likely that the rubber seal affixed to the threshold is damaged or has flattened over time and will need to be replaced; this is a relatively simple and inexpensive fix that can be completed without special tools. Before replacing the seal, however, verify that the threshold itself is in good condition, as a damaged threshold can also result in air leakage.
Should a gap still exist even if the rubber seal is tight and the threshold is in good condition, your best bet is to install a door sweep—also called a brush sweep—along the bottom edge of the door itself to prevent air and moisture from entering.
3. Upgrade Your Insulation
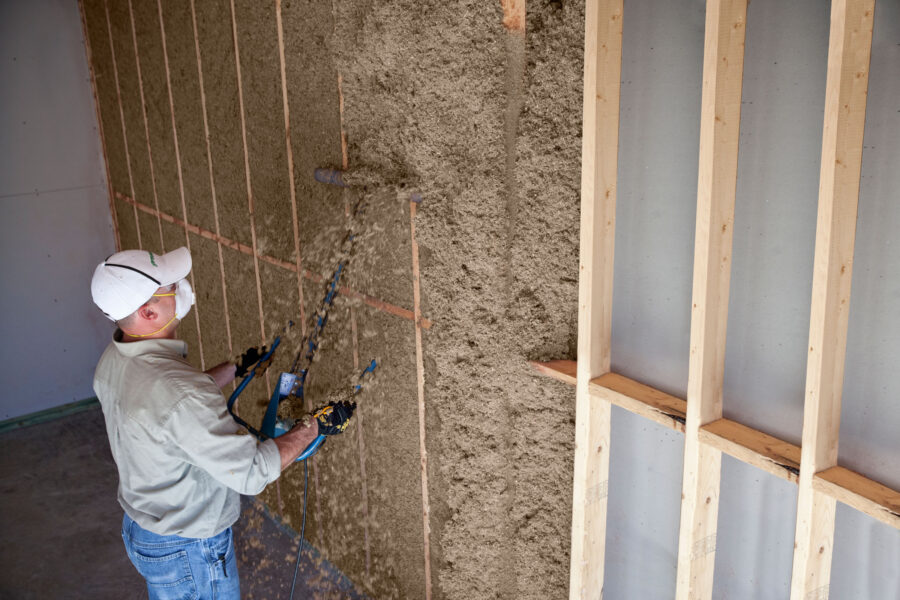
Photo courtesy of Greenfiber
Though it is one of the more involved weatherproofing methods, upgrading your home’s insulation is an extremely effective way to strengthen resilience against extreme temperatures during the summer and winter months. Before you start adding insulation, you’ll need to determine where and what kind of insulation already exists, as well as the insulation R-values; a home energy audit is the most reliable method for obtaining this sort of information.
When considering insulation upgrades, it is always recommended that you begin with those walls, floors, and ceilings adjacent to unfinished spaces and unheated/unconditioned areas like basements, crawlspaces, attics, and garages.
It is also possible—albeit more invasive—to add insulation to finished exterior walls. The least disruptive time to upgrade exterior wall insulation is alongside complete re-siding projects or during extensive remodels where wall cavities will be exposed; this also gives you a wider range of insulation types to choose from, as batts and rolls can be installed just as easily as foam or blown-in insulation.
If you choose to add insulation when wall cavities will not be open, dense-packed blown-in cellulose insulation and injectable spray foam insulation represent your least-invasive options while still providing a high R-value. Blown-in cellulose insulation—like that from leading insulation provider Greenfiber—is also particularly adept at preventing unwanted air entry in addition to preventing heat transfer.
“Our insulation fills each cavity side-to-side and top-to-bottom, without gaps or voids around obstructions like blocking or bridging, and it’s installed tightly around wiring or electricity boxes in the cavity,” Luke Shortridge, market development manager for Greenfiber’s Southwest region, previously told gb&d.
4. Install Storm Windows & Doors
As we’ve already established, ensuring all windows and doors are properly sealed helps to prevent unwanted air and moisture intrusion—but solutions like weatherstripping and caulk don’t address heat transfer through the window/door assembly itself, nor do they actively protect these features from the elements. For this reason experts recommend installing storm windows and doors.
Exterior storm windows are separate window units consisting of a single pane of glass installed on the outside of existing windows. The secondary window creates an air pocket between itself and the primary window—reducing heat transfer and improving R-value—while simultaneously protecting the primary window from rain, wind, snow, and low-velocity impacts. Most modern storm windows also feature a low-emissivity coating that helps reduce radiative heat loss and gain.
Storm windows are especially useful in older homes that still have functional single-pane windows, as installing a secondary window is typically cheaper than replacing the existing unit with a modern insulated window and delivers comparable thermal performance to a double-paned window.
Similarly, a storm door is a secondary door that is installed in front of a primary entryway door in order to protect it from the elements and provide an additional pocket of insulation. Storm doors typically consist of either one or two panes of tempered glass set in an aluminum or fiberglass frame, with the most energy efficient options boasting low-emissivity glazing to help reduce solar heat gain.
5. Select the Right Exterior Paint

Clare paints comes straight to your door when you’re ready to revive a space with a fresh coat of paint. Photo courtesy of Clare Paint
Though it may not play the most obvious role in weatherproofing your home, exterior paint does impact how well a structure holds up against the elements, acting as a barrier against weather, sun, and moisture. A thin layer of paint goes a long way in protecting the substrate beneath, and if your house hasn’t been painted in several years—or you’re just looking for an aesthetic refresh—it might be time to consider a new coat.
Two important factors to keep in mind when choosing exterior paints are UV resistance and water resistance. A high UV resistance protects paint from the sun and prevents it from fading, cracking, or peeling—ultimately leading to longer-lasting results—while water resistance ensures that the paint will hold up against the elements and prevent moisture from seeping into the underlying materials.
Clare Paint is one brand that takes immense pride in providing homeowners with high-quality, weather-resistant exterior paint. Available in a wide range of designer-curated colors, Clare Paint’s self-priming paint is ultra low-VOC, extremely durable, and offers premium protection against UV rays, frost, mildew, moisture, and even salt spray—meaning it is suitable for homes from the mountains to the coast.
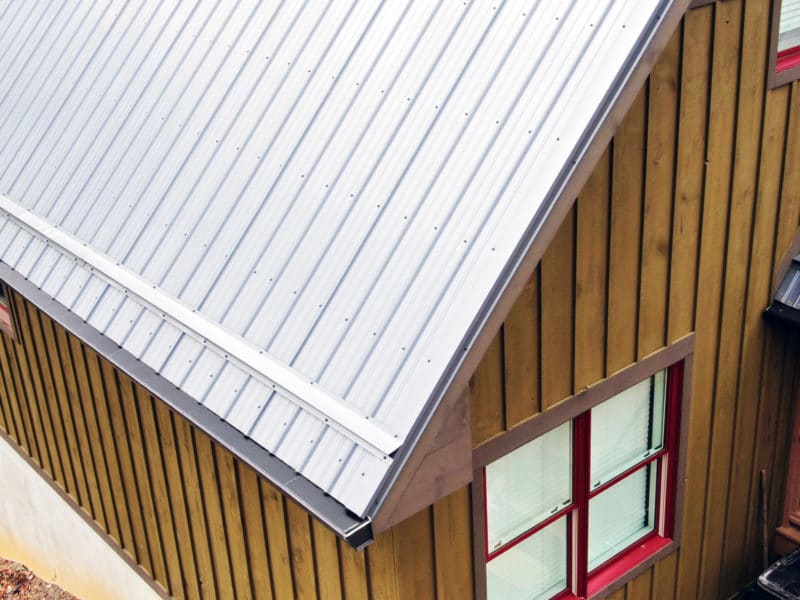
6. Replace Damaged Shingles
As your home’s first line of defense against the elements, your roof’s role in weatherproofing cannot be overstated. Different types of roofing materials provide varying degrees of protection, but all require some form of maintenance to ensure continued performance. In the US the majority of single-family homes have roofs clad in three-tab asphalt shingles; these are relatively low-maintenance shingles, requiring light cleaning once per year and possessing an average lifespan of 15 to 20 years.
Extreme weather conditions like wind and hail, however, can compromise shingles at any point, damaging them beyond repair. Compromised shingles—be they curled, cracked, or missing altogether—can in turn allow water to penetrate the roof’s underlayment, leading to potential mold growth, moisture damage, and even structural damage.
To catch these problems early on, we recommend performing a cursory inspection of your roof after hail, heavy storms, and high wind events to ensure that there are no missing or damaged shingles; compromised shingles should be replaced as soon as possible. Replacing a shingle is relatively straightforward and DIY-friendly, provided one has the proper tools and gear. A guide to safe shingle replacement may be found here.